The data warehouse can link to data in your object storage system like S3. To start, you'll need to:
- Create a bucket in S3
- Set up an access key and secret
- Add data to the bucket (we'll use Airbyte)
- Create the table in PostHog
Step 1: Creating a bucket in S3
- Log in to AWS.
- Open S3 in the AWS console and create a new bucket. We suggest
us-east-1if you're using PostHog Cloud US, oreu-central-1if you're using PostHog Cloud EU.

Make sure to note both the name and region of your bucket, we'll need these later.
Step 2: Set up access policy and key
Next, we need to create a new user in our AWS console with programmatic access to our newly created bucket.
- Open IAM and create a new policy to enable access to this bucket
- On the left under "Access management," select "Policies," and click "Create policy"
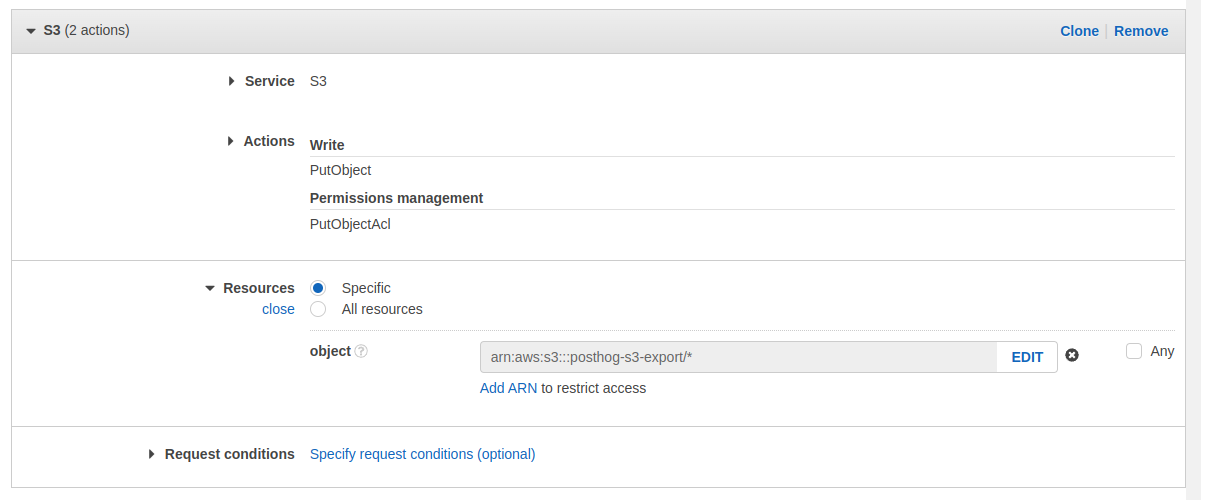
- Under the service, choose "S3"
- Under "Actions," select:
- "Write" -> "PutObject"
- "Permission Management" -> "PutObjectAcl"
- Under "Resources," select "Specific," and click "object" -> "Add ARN"
- Specify your bucket name and choose "any" for the object name. In the example below, replace
posthog-s3-exportwith the bucket name you chose in the previous section
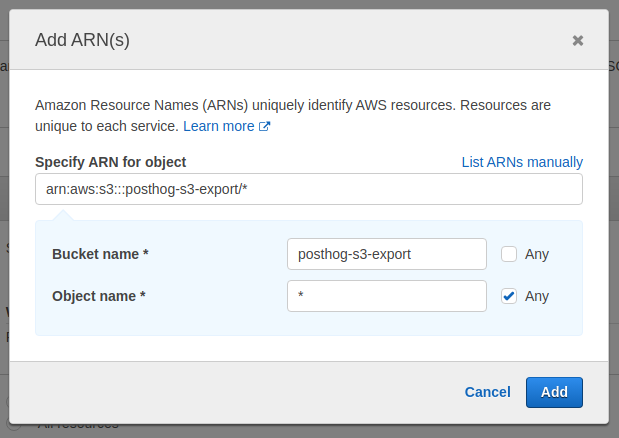
- Your config should now look like the following
- Click "Next" until you end up on the "Review Policy" page
- Give your policy a name and click "Create policy"
The final step is to create a new user and give them access to our bucket by attaching our newly created policy.
- Open IAM and navigate to "Users" on the left
- Click "Add Users"
- Specify a name and make sure to choose "Access key - Programmatic access"
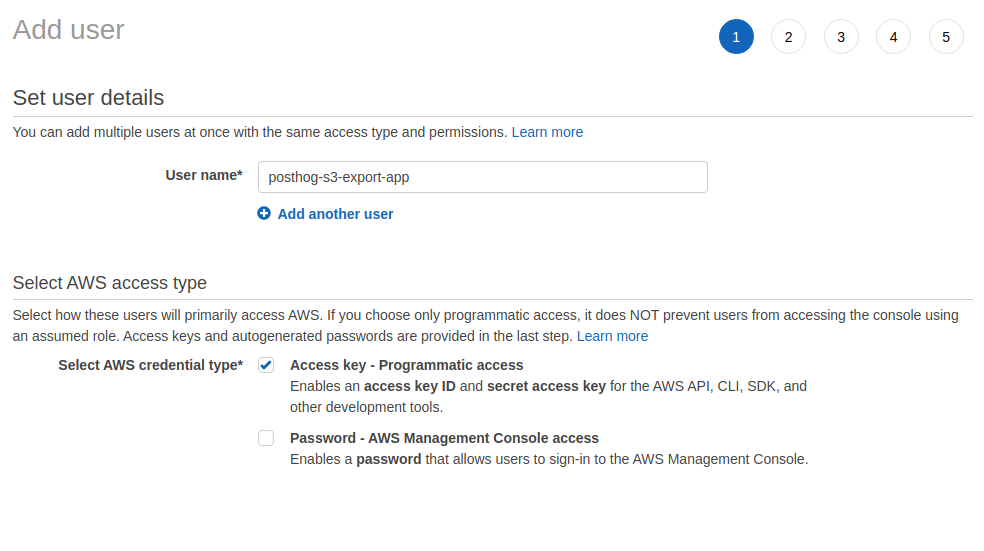
- Click "Next"
- At the top, select "Attach existing policies directly"
- Search for the policy you just created and click the checkbox on the far left to attach it to this user

- Click "Next" until you reach the "Create user" button. Click that as well.
- Make sure to copy your "Access key" and "Secret access key". The latter will not be shown again.

Step 3: Add data to the bucket
For this section, we'll be using Airbyte. However, we accept any data in CSV or Parquet format, so if you already have data in S3 you can skip this section.
- Go to Airbyte and sign up for an account if you haven't already.
- Go to connections and click "New connection"
- Select a source. For this example, we'll grab data from Stripe, but you can use any of Airbyte's sources.
- Click "Set up a new destination"
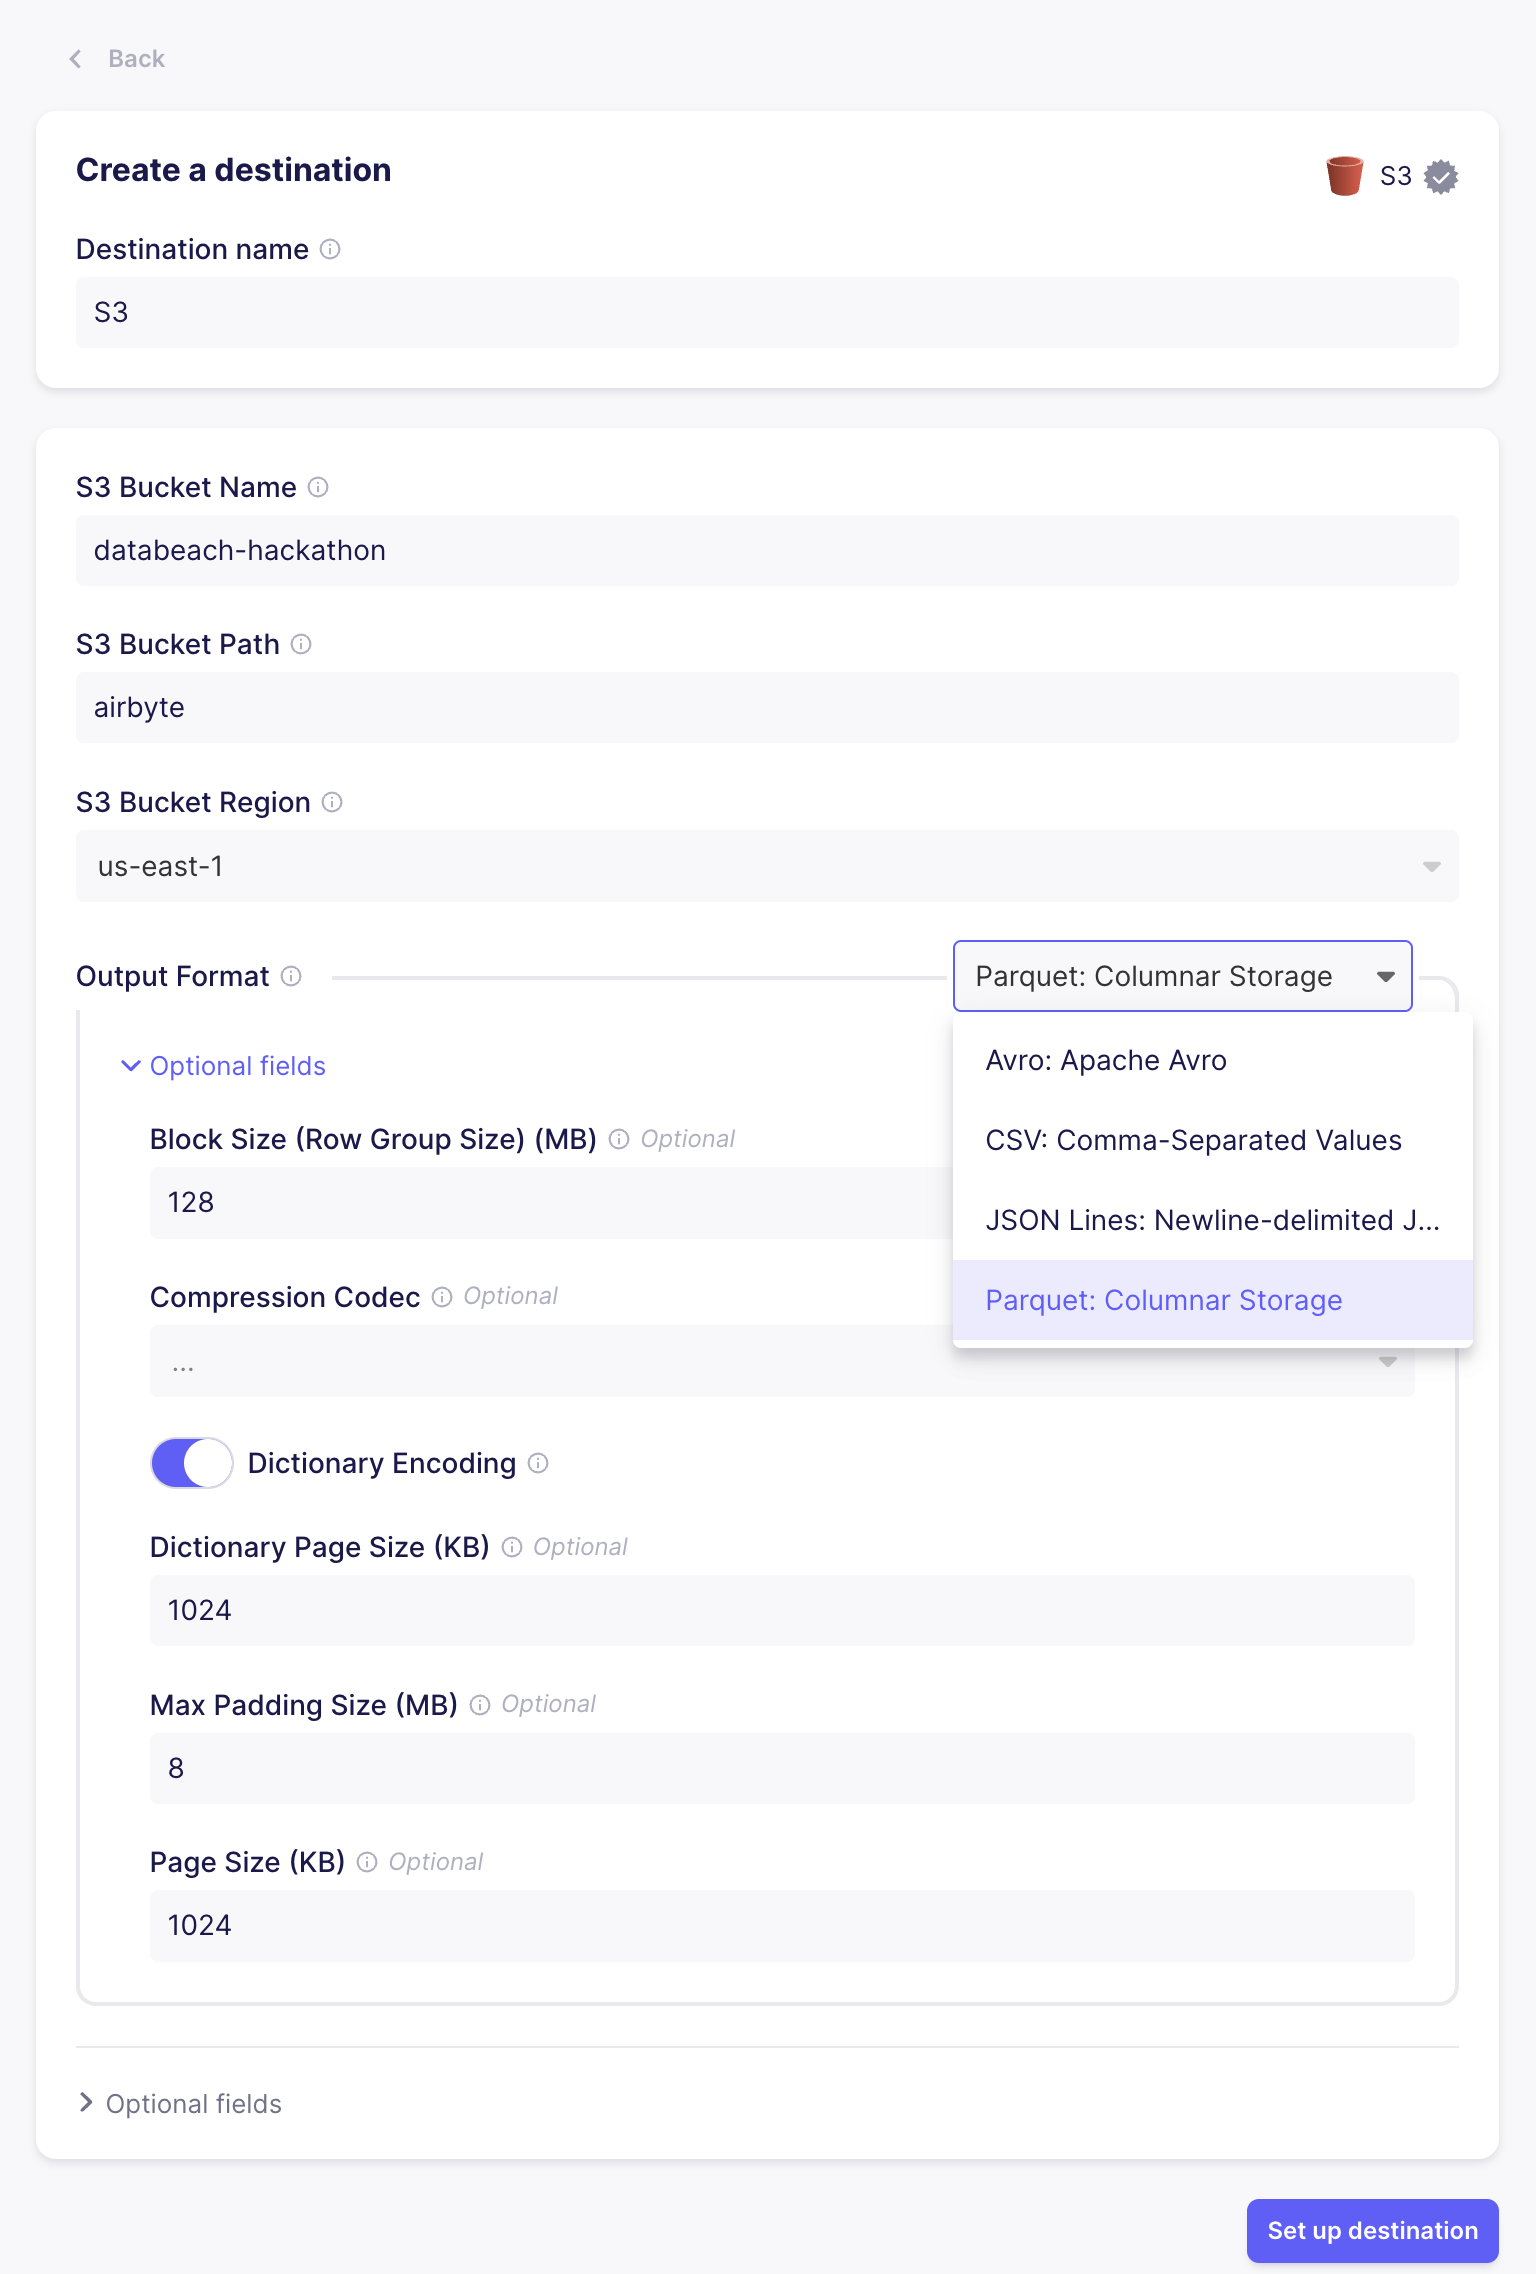
- Select "S3" as the destination
- Fill in the "S3 Bucket Name", "S3 Bucket Region" with the name and region you created earlier.
- For "S3 Bucket Path", use
airbyte. - For the "Output Format", pick Parquet. You can use the default settings
- Under "Optional fields", you'll want to add the access key and secret from step 1.
- In the next step, pick the streams you want to fill. Given you'll manually need to create a table for each stream, we suggest being selective.
- Wait for the sync to finish
Step 4: Create the table in PostHog
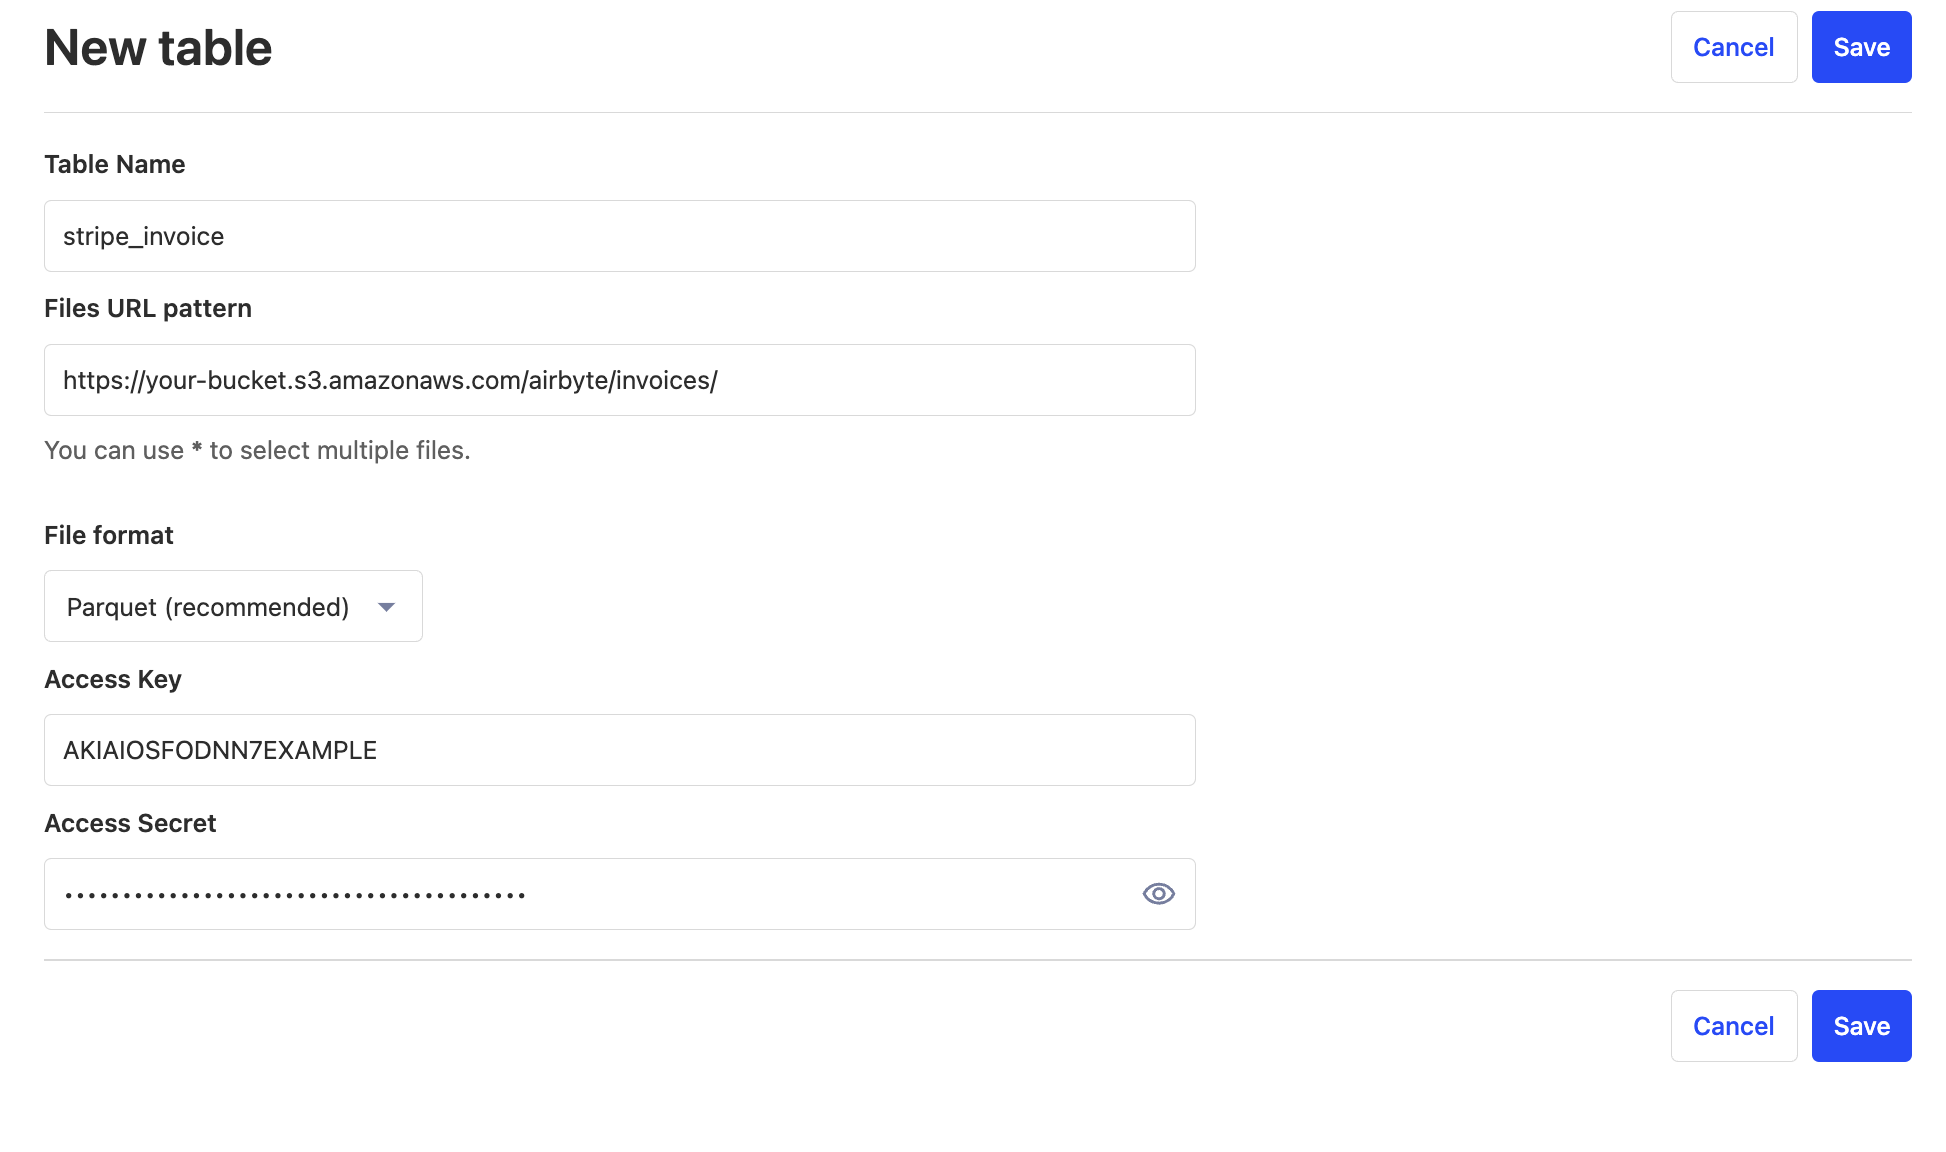
- In PostHog, go to the "Data Warehouse" tab and click "New table"
- Fill in the table name.
- For the URL pattern, copy the URL from S3, up to the bucket name. Replace the file name with
*, as Airbyte will split larges streams out into multiple files.- For example:
https://your-bucket.s3.amazonaws.com/airbyte/invoices/*
- For example:
- For file format, select Parquet. Fill in the access key and secret key.
You'll want to repeat this step for each "stream" or folder that Airbyte created in your S3 bucket.
Step 5: Query the table.
Amazing! You can now query your new table.